Whether you area beginner sewist or a seasoned veteran, drawstring bags are a quick and easy project. They are perfect for gift bags, cosmetics, chargers, and other uses. Once you get the hang of how to consruct them, they are a great project to make assembly-line style to crank out a bunch in a short amount of time. Follow along below for all the diy how-to.

Supplies
10″ x 20″ fabric piece – one for exterior, one for interior lining (fabric will be folded in half on the short edge so consider this for directional fabric)
9″ x 3″ fabric pieces for the top casing (cut 2)
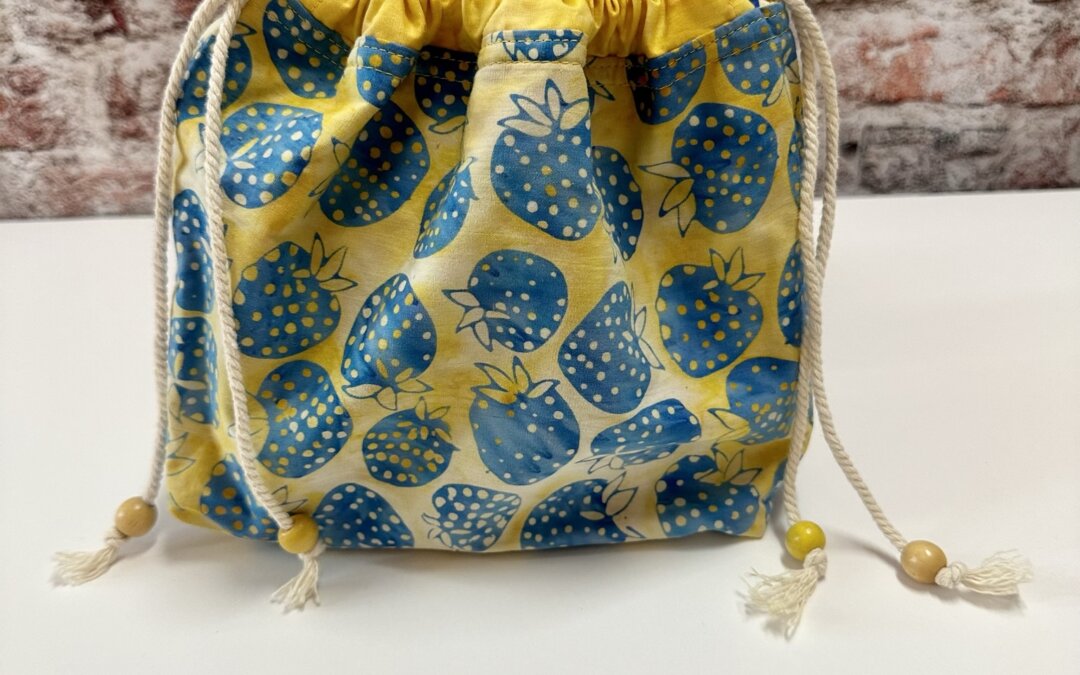
3/16″ cording or ribbon cut long enough to go in and out both sides and hang over as seen in the photo (cut 2)
4 wooden beads (optional)
coordinating thread, sewing machine, scissors, other applicable sewing supplies

Begin by taking both casing pieces, and folding each short end over on itself about 1/4″ twice so as to hide the raw edges. Do this for all four ends. Finger press each end down, then sew along the edge in a coordinating thread (see photo).This holds down the folded edges so they do not unravel over time as the drawstring is pulled through it over and over. There is no need to backstitch, as the ends will be sewn into the top of the bag later.

With both the 10″ x 20″ interior lining and exterior pieces, fold in half RST on the short edge (see phot0). Do not iron the fold. Sew 1/4″ seam allowance down both sides of the interior and lining pieces. Leave about a 4″ turnhole on one side of the lining piece. Backstitch really well at the start and finish of the turnhole. No need to backstitch elsewhere.

To box the corners…(photo is from another bag because I forgot to take a photo of the boxed corner process from this bag.🤦🏻♀️The difference is the turnhole will not be on the bottom of this bag, as is shown in the photo. Your turnhole will be on the side.)
Nest the bottom and side seams so the seams lie opposite. Line up your ruler with the sitched seam, and measure 1″ to the left and right sides of the stitch line, then draw a line with your fabric marker. Stitch on this line, backstitching very well, and cut away the excess “triangle” when done.

The photo to the left shows what you have done up to this point. Notice the boxed corner triangles of the exterior snowman fabric have not been cut away. It is completely optional to leave them attached, sometimes it can feel like it adds extra reinforcement to leave it. 🤷🏻♀️
Notice the turnhole is on the right side of the lining piece.
Now we are ready to sew the top edges together, at which point the top casing pieces will be placed in between the lining and exterior pieces. They will be sew in with the top edges to create the drawstring casing.

Place the lining inside the exterior piece RST, arranging them so the side seams nest opposite one another. Find the center point of both sides and of the casing pieces, line them up accordingly and pin the casing strips in between the interior and exterior pieces so that all raw edges are lined up. See photos for examples. Your casing strips should be about a 1/2″ shorter on both ends.

At the sewing machine, sew 1/4″ seam all the way around the top edge. Do not leave a turnhole. Remember the turnhole is in the side.
Next, flip the bag right side out and see the following directions for sewing up the turnhole.

Be sure to use a matching thread to close up the turnhole if that matters to you. It’s inside the bag, so you might not care.
To close up the turnhole, fold the raw edges in as they naturally will want to do. Finger press them in really well.
Next, topstitch about 1/8″ from the edge to close up the hole. Backstitch at the start and finish.

Now tuck the lining inside the bag. Pull the drawstring casing out and finger press the top edge really well. Using a coordinating thread, topstitch 1/8″ around the top edge of the bag. Then I like to go around again about 1/4″ from the previous stitch line. This gives extra reinforcement and a professional look.


To add the drawstring, get a safety pin and tie one end of the cording. Stick the safety pin through the knot and maneuver the pin through both casings. Repeat in the opposite direction for the other drawstring.


Enjoy using these bags as gift bags for sustainable sewing.