Reusable Gift Bag
These simple fabric bags are my new thing. I am phasing out paper gift bags and tissue paper from my home, and replacing them with fabric bags I can make in just one evening. Heck, once I get a bag figured out, I crank out several in one evening – assembly line style.
Sustainable is what I really love about these gift bags. Not only can I use them over and over, but I use fabric, trim, and other embellishments I already have in my stash or have repurposed from another use (such as cutting up an old tablecloth).
What’s even better? If the receiver wants to keep the bag as part of the gift, they are welcome to it. It’s the best compliment, isn’t it?

Supplies
So let’s think about what to have on hand when planning and executing this project. First, you can make your bag any size you want. For me, the size of my bag is often dictated by the size fabric scraps I have leftover. I’ll share my dimensions here, but loathe to list out supply lists, be confident in your ability to gauge what you need for your bag.
- Canvas bag bottom (2) cut 11″ x 4″
- Red exterior fabric (2) cut 11″x 13″
- Inside lining (also shows at the top of the bag cut (2) 11″ x 18″
- Top and bottom lace strips cut (2) of each the width of the exterior pieces 11″
- String cut (1) to the length you prefer
- Two wooden beads
- sewing supplies

Let’s Get Started
1. Begin by layering the bottom exterior pieces with their corresponding lace trim and bag exterior piece. See left photo below.
2. Glue or stitch baste the top of the bag lace feature to the top raw edge. See middle photo below.
3. Sew the front and back exterior panels together down the sides and bottom using a 3/8″ seam. See right photo below.


4. Box the bottom corners by forming a triangle at each corner. Measure 3″ across the bottom with the seam at the center point, and draw a line. Ensure side and bottom seams are nested opposite one another. See left photo below.
5. Sew along the line, backstitching at the start and finish. See right photo below.


6. Lay lining pieces right sides together. Sew a 3/8″ seam along the sides and bottom, leaving a turning hole in the bottom. Backstitch well at the start and finish of the turning hole. See left photo below.
7. Box the side seams as done in steps 4-5 above. See right photo below.


8. Turn the lining right side out.
9. Place the lining inside the exterior piece and line up the top raw edges. Pin side seams opposite to prevent bulk.
10. Sew a 3/8″ seam all the way around the bag. See top photo to the right.
11. Pull the bag right side out through the turning hole. Close up the turn hole by topstitching.
12. Push out the box seams, forming the shape at the bottom.
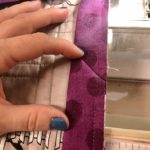
13.Pull the lining up so it protrudes evenly about 1.5″ beyond the top seam all the way around. See bottom right photo below.
13. Topstitch about 1/2″ above the top seam on the lining side to anchor in place.


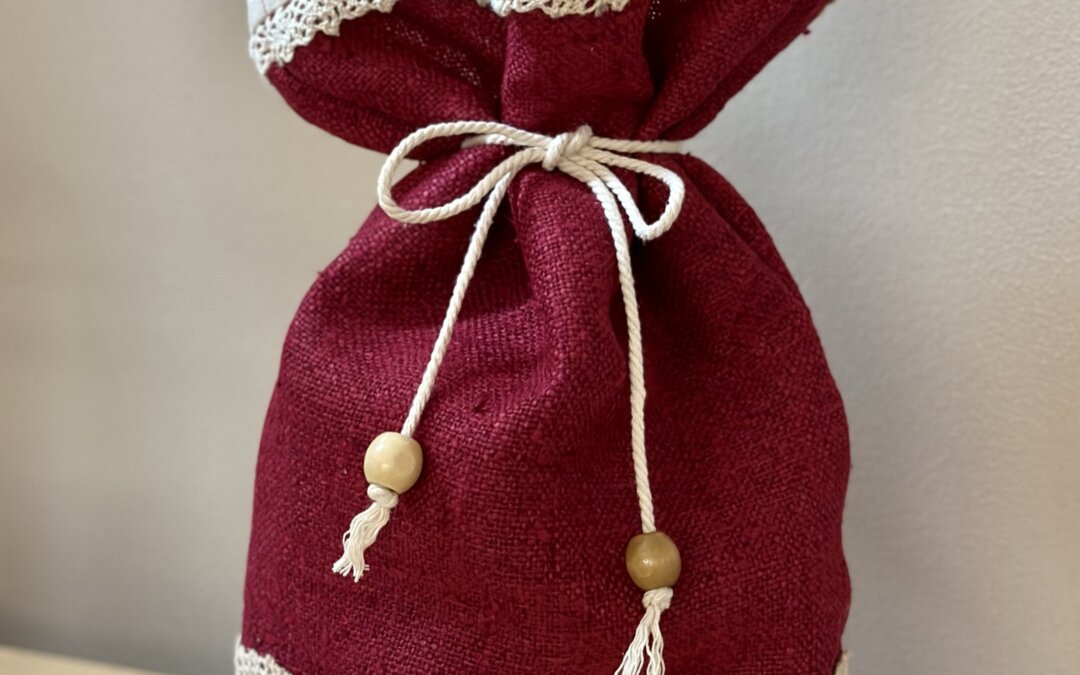
Voila!
It’s all done! Now, you just need to fill it with goodies and secure the string tied around it with a bow.
If you make one for yourself, send it my way. I’d love to see another maker’s version.
❌⭕❌⭕