So I’ve had this adorable strawberry quilt for 20+ years. I bought it at an antique store back then, and it was already quite fragile. Nevertheless, I used it as a bedspread for years. Then, I ruined it by making the stupid mistake of painting my nails over it, and of course I spilled the red polish onto the white part of the quilt. I know, for shame! 😭🤦🏻♀️
I still used it as a lap quilt from time to time, but more recently it had become even more fragile. When I would pull it up over me, I would hear threads snapping. Knowing there wasn’t much more use of this quilt as it were, my wheels starting turning about how I could repurpose it.
However I sliced and diced this quilt, I wanted to make sure to preserve as many strawberries as possible. I still have a few ideas for more projects with this quilt to come…but Easter was approaching.
I saw adorable bunny pillows on Pinterest. Bingo! I thought. Bunnies are the perfect shape to encompass the strawberries.
Whether or not you have a shape to fit right into that bunny body, you can make these pillows from an old quilt of any design, or from favorite spring time fabrics. Here’s how I did it.

First, I needed to make bunny shapes. I grabbed several dishes from my kitchen which would help me draw straight lines, and different degrees of circular shapes. I had parchment paper on hand, which is translucent. I knew with this paper, I would be able to see the strawberries through it. I needed to design my bunny shapes around these.
Don’t want to draw your own bunnies? Get my templates here.
If you don’t have parchment paper, use tracing paper or template plastic.
See below how I used the different bowls and plates to design different bunnies. I wanted to first design on parchment paper, then transfer the final result onto template plastic.
Note my bunnies had to be big enough to accommodate the strawberries which are roughly 6″. The templates I’ve provided are smaller, but you can resize them with a copier.
Below is bunny #1, the sitting up facing bunny.


Below is the making of pose #2, the sitting down bunny.


Bunny #3 is the sitting up profile bunny. Sometimes, I had to redraw lines to get the proper proportions.


Cutting into my beloved strawberry quilt wasn’t as difficult as I had anticipated. This was how I could enjoy this happy quilt in a new way.
After tracing the templates with a fabric marker, I cut them out.
I set the bunnies on top of a piece of batting and backing (a scrap of old tablecloth). The batting is meant to line the backing fabric, to give it some body and a plush feel.
Using a walking foot, I sewed a quarter inch inside the bunny outline BEFORE cutting away the batting and backing. I left an open hole for stuffing the bunny.
Before stuffing the bunnies, I cut the backing and batting off around the edges of the bunny to to make it even. The raw edges of these pillows give them a shabby chic look.


I used leftover batting for some of the stuffing. Stuffing from a discarded bed pillow was used to fill the rest of the bunnies.♻️
Find a pointy tool (here a screwdriver) to maneuver the stuffing to the hard to reach places of the bunnies.
Once bunnies were stuffed to my satisfaction, I closed up the hole by stitching it as I did the rest of the pillow.


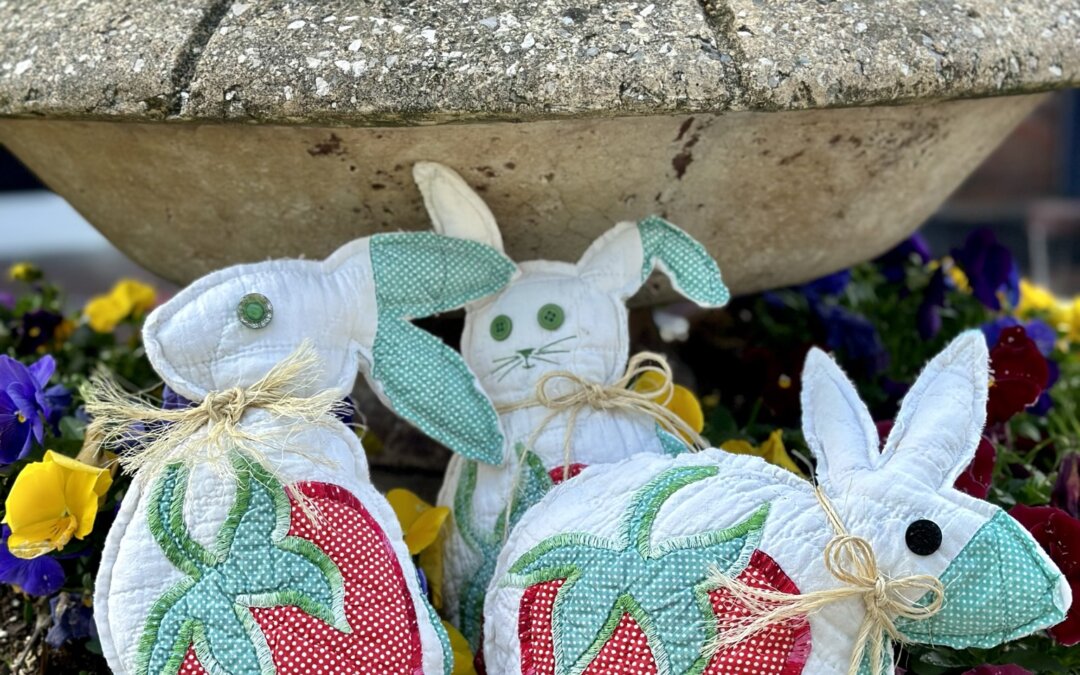
The Final Reveal
How adorable are these spring bunnies? I auditioned a few buttons for the eyes and hand stitched them on. You may choose to do this before sewing the bunnies together. Using twine, I fashioned bows around the necks for interest and texture. I love how they turned out and I can’t wait to make a few more from my quilt!